Monday, 31 January 2011

The presentation scroll ................


This is the family just after the presentation of the citation speech & the scroll.


I think the scroll looked the part when it was finished & rolled & tied :-)


It was designed & printed out on suitable paper just bigger than A3 to allow for the rolling onto the rollers.


I then embossed the rays of the large motif using heat embossing & gold embossing powder
For the crown I used a gold ink pen.


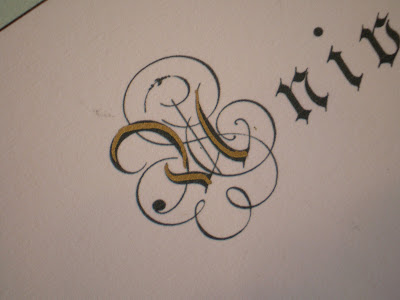
I embellished the 2 main letters of the University of Life again with the gold ink pen.


The celtic motif around the edge was filled in using the gold pen & I made tassels to go onto the end of the beaded ribbon.


Could have done with more practice time to get the wax seal a bit better.
But it did the job & looked the part as long as you don't look too closely! :-)


The rollers were made from doweling with the ends glued in place, both sprayed gold.

All in all it turned out better than I hoped when I started making it :-)


Following the theme ..................


Following the theme of the evening these were the place names that I made.
I used my Martha Stewart edge punch for the bottom & cut out the mortar board from black bazil card using a freehand template that I made.

The guests all had this format & the Guest of Honour had a larger name plate & her mortar board cut out in grey bazil card as her gown was grey.


As you can see it took a fair bit of time as there were a few to make!
I couldn't blog as I was doing the elements of the party as this would have given the game away & the theme that we were honouring MIL with was a surprise :-)

So I have been doing more crafting than my blog shows recently!

I also made the table decorations


Theses were made using my beautiful art deco cups & saucers using artificial flowers & were designed so that whichever position on the table you were sat at you go a pretty view :-)


Sunday, 30 January 2011

Talking about Graduations ...............


These are the invitations that I made for my MIL's 80th birthday party
which took place on Friday night.


The theme of the party was to give her an honorary degree in
the University of life.
She had told us all on numerous occasions that she has  loved seeing her children & grandchildren Graduate from University & she wished she could have had the chance herself .......


We also enclosed reply postcards in with the invitations which I stamped onto plain postcards using both the graduation & learning theme & we printed the details on the reverse.

Saturday, 29 January 2011

Masters Degree Congratulations Card


Our nephew Graduated from Exeter Uni last weekend with a Masters degree
so I made him this card.


I used my Graduation stamp on white bazil card & matted it onto black bazil card, also the paper & mounted both onto a blue bazil background
I used my sizzix Go Slim alphabet to cut the MASTERS.


brown pearl dots in the corner....


I cut out the mortar board out of black card freehand.

Wednesday, 26 January 2011

Bling for Hazel!


This is my card this week for Hazel's Xmas card challenge blog
The theme this week is Bling


I added stickles to the black stamped image for the 'bling'
to bring out the halo's & star.

I used icicle stickles for the tree's to represent snow.

Tuesday, 25 January 2011

Driving test pass card


Our niece has passed her driving test!
She was sneaky & didn't tell anyone that she was taking it! :-)
Congratulations!!
This is the card that I made for her.


I used green bazil card for the background & stamped it with the word freedom using my letter set.
*TIP* - I taped the letters together to make the word so that I could repeat it as a background.


I used my new nesties in the largest size to cut the map out
and placed it over the background papers.


I made the L Plate, coloured it with copics & outlined the L 
with a copic lining pen.


To finish I added the 'antique' used, worn AA key that had been
on my keyring for years!
special for my niece/goddaughter 
tied with red ribbon :-) to complement the red ribbon on the bottom 
& the congratulations sentiment

Tuesday, 18 January 2011

Xmas trees for Hazel


This is my card for this weeks challenge on Hazel's Xmas Challenge blog.
The theme this week is trees so here is my take on the challenge.


The base tree is stamped with gold paint & stenciled over with green.
The dark green trees are die cuts.
Mounted on a background that is distress inked, graduated, mounted on a square basil background & then onto Christmas paper from a Christmas stack.

One more Xmas card down for next Xmas!! 
Thank you Hazel!

Thursday, 13 January 2011

18th Birthday card


For my nephew in the USA.
Now you may wonder why the monkey? Well his nickname has always been 'Monkey boy' so it seemed that my cheeky monkey stamp was just the thing to hold the 18 circle which I used my punches to cut.


I stamped out the monkey on his branch & coloured him using my Copics.


I cut him out & mounted him using sticky fixers onto a tag which I cut using a Sizzix die which I coloured using distress inks.
I used a toning green brad in the tag hole.


I used black sequin waste over the toning papers 
and finished it off with the Happy Birthday sentiment stamped onto the matted toning backing papers.

Wednesday, 12 January 2011

Another attempt!


This time with a bit of colour using my Copic's to colour this lovely stamp


Think as I've added embellishments round the bottom I would put a note on saying for ornamentation only.
I added the ribbon band of corrugated card, a lovely blue bloom & 3 blue pearl embellishments.
  

I'm much happier with the melting process this time :-)
It's much smoother than my first attempt ...........


I used fairly subtle colours for my first try with colour & I'm happy with the vintagey look I achieved.

Monday, 10 January 2011

Retirement Card


Just heard that a friend of ours is retiring - so here is the card I made for him today.
It will be winging it's way across the pond to the USA very soon.


The sentiment seemed very apt :-)
Mounted on Nestie shapes


Retirement was cut out of mount board with my Sizzix Go slim alphabet (upper & lower case) which I inked & then mounted onto the ribbons.

The circular sentiment was a gift from a crafting friend :-)
and the person this is for is indeed Special! :-)

Wish the colours had come out better in the photo - it does look better in real life - honest :-)

Friday, 7 January 2011

Need more practice!


This is my first try at decorating candles using stamps & tissue paper


I'm quite pleased with the results for a first try but know that now I know what I'm aiming for & how things work I could do much better!


This was just using a stamp - no colouring - the possibilities 
are endless ................

I'm looking forward to having a play with this technique :-)

Wednesday, 5 January 2011

90th birthday card


It's my Auntie's 90th birthday today!
We are going to the tea party to celebrate the occasion this afternoon and this is the card I've made for her.


I covered the numbers with paper & inked the edges for definition.


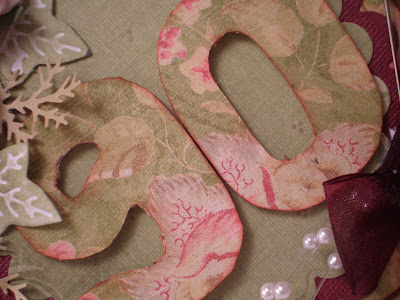
I added the flowers & the leaves. the leaves are punched & the ivy leaves inked over the white card to show the embossed veins.


The opposite corner has the ribbon bow, pearl strands & the hat pin which I added coordinating beads to.

Tuesday, 4 January 2011

My entry to Xmas all year ...............


This is my entry to Hazel's new weekly Xmas card challenge - week one


It's my first Xmas card of the year! :-)

Will try to keep it up with Hazel's help & get a head start to next Xmas ...

Thanks Hazel - I always have good intentions but life gets in the way!! :-)

Monday, 3 January 2011

Better late than never .....................


Sorry it's late Sue but here is my '5 Gold Rings'
A gold version of the necklaces i make :-)
in fact I'm wearing one of the silver, multi coloured beaded ones today :-)


I blame the camera 'borrower' for the lateness of my entry into the 12 days of Xmas day 5! for Sue's 12 Days of Xmas challenge/quiz over on Crafts by Carolyn
I managed to get most of the rest in on time :-)